

In this post we will be creating a pie chart. I know, I know...there are many pie chart libraries (or "engines") out there that would produce a pie chart for you, but to be honest I've never been happy of any of them. They didn't give enough options to tweak my pie. Not to mention you might not like the way they look.
This is the first amongst the few posts that we'll shed some light on how to create your own pie chart. We will give you an almost complete solution that includes touch interaction, state feedback (on touch), and implementing callback methods on your pie chart component at the end of this series.
In this post we will only focus on drawing a chart on our canvas so consider this post as step one. On our next post we will focus on adding interactivity (and state feedback) on our pie chart. Finally, our last post we will add callback functions so follow along.
The VITAL part of our Pie Chart (The Drawing)
This is probably the most important task in series. A pie chart is like a whole box of pizza (my favorite, yum yum). Its a circle that's cut up into "arcs" (Remember this, you'll need it later). Of coarse, just like many pizza restaurants, pizza is delivered within a box. That's exaclty what we are going to be doing....we are going to be drawing "arcs" (pizza slice) one by one till they make up a full circle (the entire pizza) within a box. So when drawing our pie this is what you will have to know:
- You will have to scale all values supplied to your component so that they fit inside 360 degree angle. Remember a pie chart is a circle, and a circle is 360 degrees. This scaling needs to be done because you might not know how big the values you will be supplying to your pie chart are. For all we know you might be working with values that are six digits. So THIS IS IMPORTANT otherwise your chart will either yield inconsistent projections
- The start point of each pizza slice
- The end point of each pizza slice
So let's get cracking...
These are the variables we are going to use for drawing our chart:
public class PieChartView extends View {
    private Paint slicePaint;
    private int[] sliceClrs = {  Color.GREEN, Color.BLUE, Color.RED, Color.YELLOW };
    private RectF rectf; //Our box
    private float[] datapoints; //Our values
}
Let's initialize our paint variable in our constructor:
public PieChartView(Context context, AttributeSet attrs)  {
    super(context, attrs);
    slicePaint = new Paint();
    slicePaint.setAntiAlias(true);
    slicePaint.setDither(true);
    slicePaint.setStyle(Style.FILL);
}
Now lets define our method that will scale the values supplied to the chart. Remember we have to scale it to fit 360 degress.
private float[] scale() {
    float[] scaledValues = new float[this.datapoints.length];
    float total = getTotal(); //Total all values supplied to the chart
    for (int i = 0; i < this.datapoints.length; i++) {
        scaledValues[i] = (this.datapoints[i] / total) * 360; //Scale each value
    }
    return scaledValues;
}

private float getTotal() {
    float total = 0;
    for (float val : this.datapoints)
        total += val;
    return total;
}
Let's take a quick look above on how the scaling works for all the values to fit inside 360. Suppose the values are supplied like this [300, 1500, 475] (Whip out your calculators. We're having a maths class). The scaling method scales calculations will be as follows:
- For index 0: (300 / 2275) * 360 = 47.47252747252747 (This will occupy 48 out of 360)
- For index 1: (1500 / 2275) * 360 = 237.3626373626374 (This will occupy 237 out of 360)
- For index 2: (475 / 2275) * 360 = 75.16483516483516 (This will occupy 75 out of 360)
So of you add all the scaled values they will occupy 360 (48 + 237 + 75) which is a full circle. Now let's define our drawing method and our mutator method for setting the datapoints:
@Override
protected void onDraw(Canvas canvas) {
    if(this.datapoints != null) {
        int startTop = 0;
        int startLeft = 0;
        int endBottom = getHeight();
        int endRight = endBottom; //To make this an equal square
        //Create the box
        rectf = new RectF(startLeft, startTop, endRight, endBottom); //Creating the box
        float[] scaledValues = scale(); //Get the scaled values
        float sliceStartPoint = 0;
        for (int i = 0; i < scaledValues.length; i++) {
            slicePaint.setColor(sliceClrs[i]);
            canvas.drawArc(rectf, sliceStartPoint, scaledValues[i], true, slicePaint); //Draw slice
            sliceStartPoint += scaledValues[i]; //Update starting point of the next slice
        }
    }
}

public void setDataPoints(float[] datapoints) {
    this.datapoints = datapoints;
    invalidate(); //Tells the chart to redraw itself
}
We first start by creating the box by using the RectF object to draw our pie in and then call the scale method to get the new values. We then loop through these values and change the paint color for every slice. The method drawArc() is the method that does the magic by drawing the slices. It required 5 parameters (paremeter one being the first being the square to draw in, second being the start point of the slice, third parameter is the end point, fourth is whether to start drawing slices from the center of the circle, and last is the paint object that contains the color of the slice).
The method setDataPoints() sets the datapoints and calls invalidate() which tells the view to redraw itself. This is how the entire class looks like:
package com.example.customview.component;

import android.content.Context;
import android.graphics.Canvas;
import android.graphics.Color;
import android.graphics.Paint;
import android.graphics.Paint.Style;
import android.graphics.RectF;
import android.util.AttributeSet;
import android.view.View;

public class PieChartView extends View {
    private Paint slicePaint;
    private int[] sliceClrs = { Color.GREEN, Color.BLUE, Color.RED, Color.YELLOW };
    private RectF rectf; // Our box
    private float[] datapoints; // Our values

    public PieChartView(Context context, AttributeSet attrs) {
        super(context, attrs);
        slicePaint = new Paint();
        slicePaint.setAntiAlias(true);
        slicePaint.setDither(true);
        slicePaint.setStyle(Style.FILL);
    }

    @Override
    protected void onDraw(Canvas canvas) {
        if (this.datapoints != null) {
            int startTop = 0;
            int startLeft = 0;
            int endBottom = getWidth();
            int endRight = endBottom; // To make this an equal square
            // Create the box
            rectf = new RectF(startLeft, startTop, endRight, endBottom); // Creating the box

            float[] scaledValues = scale(); // Get the scaled values
            float sliceStartPoint = 0;
            for (int i = 0; i < scaledValues.length; i++) {
                slicePaint.setColor(sliceClrs[i]);
                canvas.drawArc(rectf, sliceStartPoint, scaledValues[i], true, slicePaint); // Draw slice
                sliceStartPoint += scaledValues[i]; // Update starting point of the next slice
            }
        }
    }

    public void setDataPoints(float[] datapoints) {
        this.datapoints = datapoints;
        invalidate(); // Tells the chart to redraw itself
    }

    private float[] scale() {
        float[] scaledValues = new float[this.datapoints.length];
        float total = getTotal(); // Total all values supplied to the chart
        for (int i = 0; i < this.datapoints.length; i++) {
            scaledValues[i] = (this.datapoints[i] / total) * 360; // Scale each value
        }
        return scaledValues;
    }

    private float getTotal() {
        float total = 0;
        for (float val : this.datapoints)
            total += val;
        return total;
    }
}
Testing our pie chart view
We are now going to be testing our pie chart on our activity. This is how our XML layout file looks like:
<?xml version="1.0" encoding="utf-8"?>
<LinearLayout xmlns:android="http://schemas.android.com/apk/res/android"
    android:layout_width="match_parent"
    android:layout_height="match_parent"
    android:orientation="vertical" >

    <com.example.customview.component.PieChartView android:layout_width="600dp"
        android:layout_height="600dp"
        android:id="@+id/pie_chart" />

</LinearLayout>
And this is our activity class:
package com.example.piechartexample;

import com.example.customview.component.PieChartView;
import android.os.Bundle;
import android.app.Activity;

public class MainActivity extends Activity {

    @Override
    protected void onCreate(Bundle savedInstanceState) {
        super.onCreate(savedInstanceState);
        setContentView(R.layout.activity_main);
	    setTitle("Interactive Pie Chart");

        PieChartView pieChartView = (PieChartView) findViewById(R.id.pie_chart);
        float[] datapoints = {450, 1230, 200, 400};
        pieChartView.setDataPoints(datapoints);
    }

}
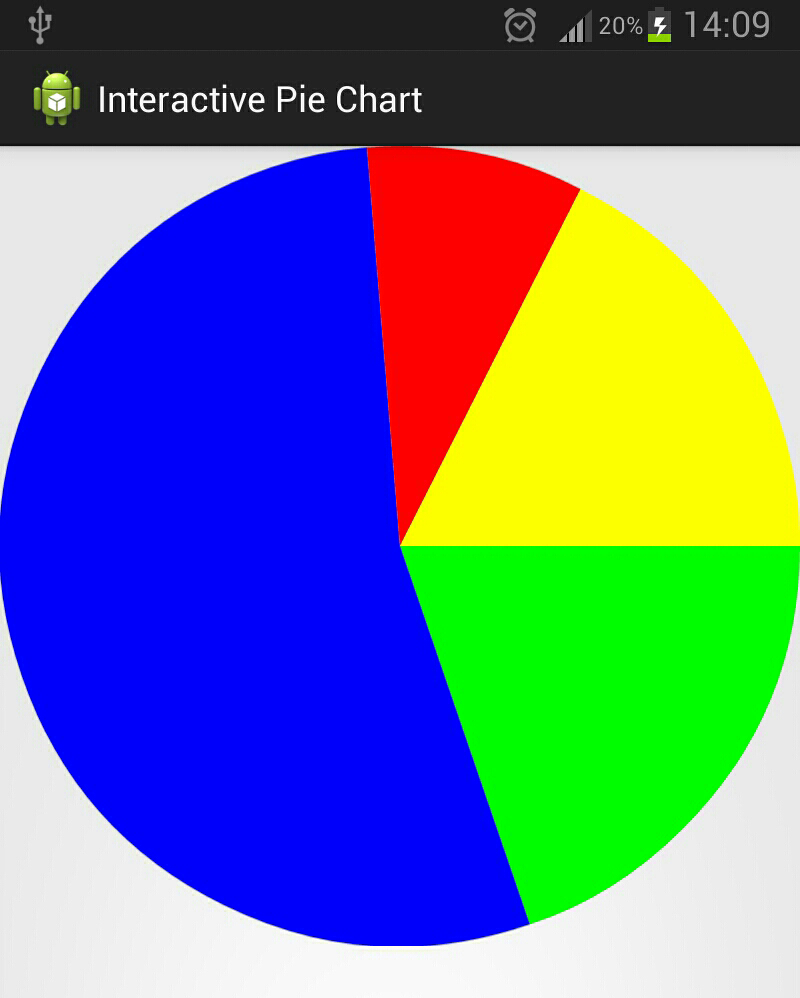
The final result
Conclusion
And here it is, Our custom view has been created. It looks very standard, flat, and not very pretty I'm afraid. That's where you come in now. Our goal was to get you creating a pie chart. Now we'll be moving on and adding interaction on our view so stary tuned
Comments